Dockerize a Python application, work with containers.
In this scenario we have a simple flask application that we want to dockerize, our application consists of a single file named server.py.

Dockerize a Python Application: Work with Containers
A guide on how to dockerize a Flask application.
In this scenario we have a simple Flask application that we want to dockerize, our application consists of a single file named server.py.
Directory Structure
Our application directory structure is the following./app/
├── Dockerfile
├── requirements.txt
└── src
└── server.py1 directory, 3 files
server.py
src/server.py: this directory holds the server.py file, which is our application, its content is:from flask import Flask
server = Flask(__name__)@server.route("/")
def hello():
return "Hello World"if __name__ == "__main__":
server.run(host='0.0.0.0')
It's a simple application, it only returns “hello world” but it's great for our demo purposes.
requirements.txt
requirements.txt: the libraries that our application needs, will be added to the image, its content areFlask==1.1.1
Dockerfile
Dockerfile: is the instructions needed for docker to create the image. its content is:FROM python:3.8
WORKDIR /code
COPY requirements.txt .
RUN pip install --no-cache-dir -r requirements.txt
COPY src/ .
CMD [ "python","./server.py" ]
Let's examine what each line does:FROM python:3.8
It asks docker to use image python:3.8, if this image could not be found locally it will be downloaded from the dockerhub.WORKDIR /code
The WORKDIR instruction sets the working directory for any RUN, CMD, ENTRYPOINT, COPY and ADD instructions that follow it in the Dockerfile. If the WORKDIR doesn’t exist, it will be created even if it’s not used in any subsequent Dockerfile instruction.COPY requirements.txt .
Copies requirements.txt to WORKDIRRUN pip install --no-cache-dir -r requirements.txt
It will install to the image we create the libraries defined in requirements.txtCOPY src/ .
It will copy all contents of src/ to WORKDIRCMD [ "python","./server.py" ]
This is the command that will be executed when docker runs a container using this image, this is a shortcut topython /code/server.py
Building the image
Now we know what each line of the Dockerfile does let's proceed to the actual building of the image.$ cd ./app
$ docker build -t python-flask .
This command will create a local docker image with the name python-flask
Viewing the image$ docker images
This command will output all the local images along with some details like their id, when created, size, name, tag, etc.$ docker inspect python-flask
This command will output a long JSON output with details regarding this image.
Starting the container$ docker run -d -p 5000:5000 python-flask
- -d: starts the container in the background
- -p 5000:5000 maps port 5000 of the container to the local port 5000 of the docker host, we know that we have to map port 5000 to docker host because 5000 is the default flask port.
Now start a browser and enter http://localhost:5000 you should see something like the following:

This means that we have built the image successfully and created a container using this image.
Let's see some details regarding the running container.$ docker ps
This command outputs the status of the running containers.

We can see the container id and which image is used, the command that the container runs when the container is created and when the container started, any port forwards that we might create, also docker adds a random name to each container, in this case, is intelligent-cohen.
Launch multiple containers using a single image
Docker can create multiple containers using the same image, the only restriction is that the locally forwarded port cannot be 5000 because is already taken by the “inteligen-cohen” container.
Note that in this example we used local port 5001.$ docker run -d -p 5001:5000 python-flask
Start a browser and enter http://localhost:5001.
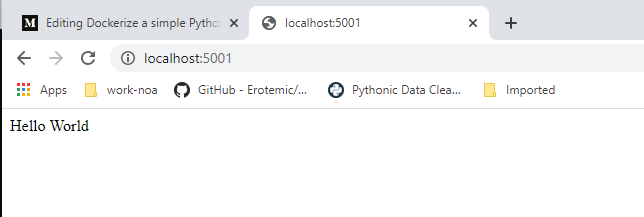
Success! we are getting the hello world text!
At the prompt enter:$ docker ps

We can see that the running containers are now two
One container is the “inteligent_cohen” and the second one is “dreamy_taussig” which started 47 seconds back, and the locally forwarded port is 5001.
Stopping Containers$ docker stop dreamy_taussig
This command will stop the container by sending to its running process a SIGTERM signal, if the application has not been terminated in 10 seconds then docker will automatically issue a SIGKILL command to the PID of this container which is equal to:$ docker kill dreamy_taussig
Killing a container is not a good idea because it does not give time to the container to finish any tasks that might not have to end, this can lead to data corruption in some cases.
To verify that the container has terminated we can issue:$ docker ps

We see that only one container is currently running, the “inteligent_cohen”. There is a “trick” we can see what containers run in the past by using the -a switch.$ docker ps -a

We can see that “dreamy_taussig” exited 5 minutes ago.
Restarting containers
Stopping a container does not mean that the container is deleted, we can restart the container with the start command:$ docker start dreamy_taussig
$ docker ps

We can see that the container is up and running.
Deleting a container
To delete a container and not just to stop the container we need to stop the container using the stop command and then the container rm command:$ docker stop dreamy_taussig$ docker container rm dreamy_taussig

As you can see the docker ps -a does not show any stopped container, the container has been deleted.
Note that deleting a container does not delete the image.
I hope you found the article interesting :)
More content at PlainEnglish.io. Sign up for our free weekly newsletter. Follow us on Twitter and LinkedIn. Join our community Discord.
