Ubuntu: How to use netplan to configure static IP
Netplan enables easily configuring networking on a system via YAML files. Netplan processes the YAML and generates the required…

Netplan enables easily configuring networking on a system via YAML files. Netplan processes the YAML and generates the required configurations for either NetworkManager or systemd-network the system’s renderer. Netplan replaced ifupdown as the default configuration utility starting with Ubuntu 17.10 Artful.
To configure a static ip address you need first to generate a YAML configuration file.$ sudo netplan generate
Then we need to edit the generated filesudo vim /etc/netplan/00-installer-config.yaml
You should see something like the bellow, image but the interface name (enp0s3) might not have the same name or you might see more interfaces if your computer have many network interfaces.
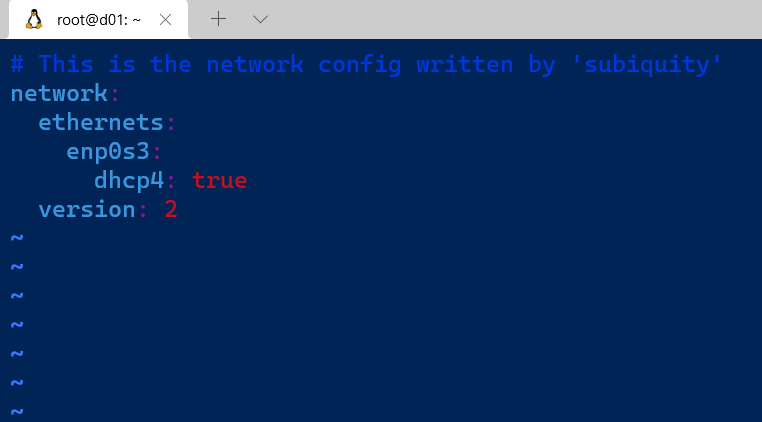
Change the configuration to match the following# This is the network config written by 'subiquity'
network:
ethernets:
enp0s3:
dhcp4: false
addresses: [192.168.1.245/24]
gateway4: 192.168.1.1
nameservers:
addresses: [192.168.1.1,8.8.8.8]
The following options must adjusted to match your configuration
- addresses: the interface ip address
- gateway
- nameserver — addresses
After saving changes the configuration we apply the configuration$ sudo netplan apply
Important note: if you are over SSH the connectivity to the host will be lost when you apply the changes, if the configuration ip address is conflicting with another ip or you give a non routable ip address the host will not be reachable any more.
I hope you find this article enjoyable :)